Monday, January 19, 2015

Increase the Feedback Loop with Google Apps!

Increase The Feedback Loop With Google Apps


Educational researcher, John Hattie, in his book Visible Learning, has identified Feedback as one of the top ten influencers on student achievement. Further, in Dylan Wiliam’s book Formative Assessment, Wiliam cites a study that showed that comments-only marking of work had a greater impact on student achievement than did grades-only or even a combination of grades and comments. Google Apps in the classroom can easily harness the power of feedback in many ways!

Some Notes On Feedback


Not all feedback is created equal and it is not enough to just say what you think. Feedback should be timely and specific. Avoid generalizations and don’t be afraid to point out errors. However, be sure to point out the good things students are doing as well! It is important students know what they are doing right.

Further, feedback should be a continuous “loop” of student/teacher, student/student, or student/teacher/student interaction. It should not be a one-way street. Engage students in a conversation and get peers involved to get the most out of them.

But how can Google Apps help?

Sharing


Let’s just start with the most basic and important function of Google Apps: Sharing. When a student shares a document, presentation, or spreadsheet with a teacher, that action immediately opens the door to feedback. Teachers can review work at any time and hold conversations either virtually, or in person, about the work. In the old way, if students wanted the teacher’s feedback, they would have to find a time before or after school, which is a precious commodity for both parties!

Insert Comment


This feature is great for offering more specific feedback to students. By selecting a sentence, word, paragraph, or character, the teacher can open a conversation about that specific element. To do this, simply select the element on which you want to comment and select “Comment” from the “Insert” menu (or click the shortcut in the toolbar).
http---makeagif.com--media-1-05-2015-TqNQMP.gifhttp---makeagif.com--media-1-05-2015-P2jDl1.gif

A “sticky note” will open off to the right where you can type your comment. This “sticky note” will be attached to the element you highlighted and will become active when either the element or note is clicked. Collaborators can reply to the comment as many times as necessary until the issue is resolved.

If the document is shared with multiple people, and the comment is for a specific person, there is a great feature that makes this simple! In the comment “sticky note” type a plus sign followed by the person’s email address (ex. +aaron@bodhigafe.com). This comment will be emailed to only that person and not all collaborators.

This type of “asynchronous” collaboration makes Google Docs very powerful in the classroom!

Suggest Edit


A relatively new feature allows collaborators to “mark-up” the paper with suggested edits. To utilize this feature, you must be in “Suggesting” mode. You can switch to “Suggesting” by clicking the “Mode” shortcut in the top right corner of the document and selecting “Suggesting” or via the “View” menu.
http---makeagif.com--media-1-05-2015-LTsf7W.gifhttp---makeagif.com--media-1-05-2015-QJltNk.gif

When this feature is used, the old text gets a line struck through it and the suggested change is added in green. A “sticky note” is activated off to the right and collaborators can decide to accept or reject the suggested change.


http---makeagif.com--media-1-05-2015-EvlM60.gif

Google Classroom


Google Classroom was developed to make the dissemination and collection of digital work simpler for teachers and students. An added bonus is the amount of feedback opportunities that are inherent in Google Classroom.

To begin with, when a teacher creates an assignment using a template, or when the student submits a document, sharing is immediately established between student and teacher. The teacher can insert comments, or use Suggest Edit mode, to offer feedback throughout the assignment.

Further, each assignment has a comment feature where students and teachers can communicate privately about the work. This is great to offer general, more holistic, feedback to students to keep them on the right track.

Kaizena


Kaizena is a Drive App and Add-On that makes the feedback and commenting features even more personal and powerful. The reason for this is that it allows the teacher to record their voice in making comments. I have seen this used with students and they love it because it feels like the teacher is sitting right next to them, helping them. Teachers love it because they can talk faster than they can type so “marking papers” can be a much easier task.

Teachers can also provide other resources to students besides just their words of wisdom. They can provide videos, websites, or other digital resources that might help the student with their project.

To make Kaizena a part of your Google Docs experience, just go to the Add-ons menu in a Google Doc and select “Get Add-ons.” You will then search the window for Kaizena and click the “Free” button to install. Kaizena will then be available in every Google Doc you create.

Watch this video to get started with Kaizena.

It is important to note that Kaizena only works with Google Documents and must be installed for both student and teacher.

Timely, specific, and meaningful feedback helps move learning forward more than most strategies we use in the classroom. Google Apps is a great tool to accomplish this in the classroom.

This is a post I wrote for Synergyse


Friday, December 19, 2014

Awesome Chrome Features You Probably Aren't Using

Hi all!

The following is a post I wrote for Synergyse, a company that focusses on Google Apps training.

Enjoy!

Awesome Chrome Features You Probably Aren’t Using


When I became a Google Certified Teacher, my daily production was still done primarily in Microsoft Office. I made the decision, at that time, that all of my new productivity would be done in Drive. I would still use the old Office documents, if needed, but create new in Drive.


And I haven’t looked back!


Now, only 3 years later, all of my productivity, with the exception of video creation and editing, is done in Google Drive. Furthermore, my browser of choice is Chrome for the simple reason that Google products work best with Google products. Makes sense, doesn’t it?


My computer doesn’t have near the issues that some of my colleagues experience because, for the majority of the day, the only application I have running is the Chrome web browser. I can access my email, my calendar, create documents, create and manage websites, blog...nearly everything I need to do on a daily basis within one application.


Life is simpler.


And more powerful! I’m going to share with you some things you can do with Chrome that you might not be using. You might have heard about them, but remember that champions don’t need to be told what to do, just reminded!


The Omnibox
The Omnibox is Chrome’s all-in-one search engine and address bar. They must have known that it drove me nuts to see a person type an address into a Google Search bar. Chrome will know what you want to do.


But there is so much more the Omnibox can do, and here are just a few examples:


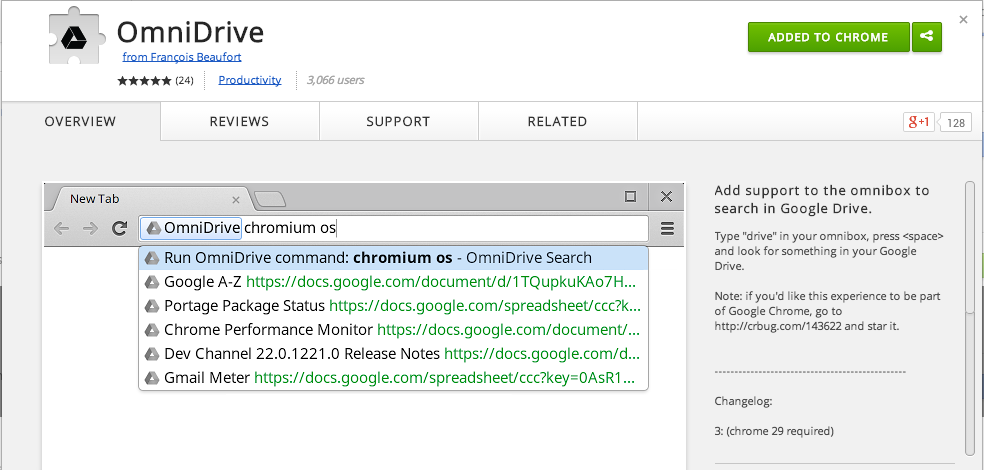
Search Drive
Install the extension OmniDrive from the Chrome Web Store


Type “Drive” then tab/space and type your query


Screen Shot 2014-11-20 at 2.51.34 PM.png


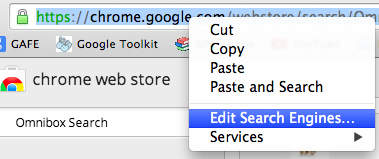
Search Gmail
Right-click on the Omnibox and select “Edit Search Engines”
Screen Shot 2014-11-20 at 2.55.25 PM.png


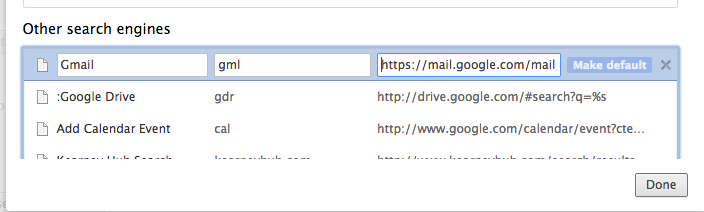
In the window that opens, scroll down to “Other Search Engines” and click “Add a New Search Engine. In the boxes, from left to right, enter


Screen Shot 2014-11-20 at 2.56.01 PM.png


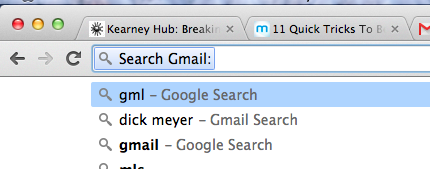
To search your Gmail, in the Omnibox type “gml” and hit Tab or Space. Your Omnibox will change:


Screen Shot 2014-11-20 at 2.56.33 PM.png


Type your query in the Omnibox and a your Gmail will open with those search results.


Do Math
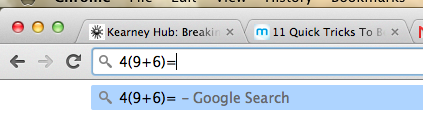
Enter your calculation


Screen Shot 2014-11-20 at 3.09.56 PM.png


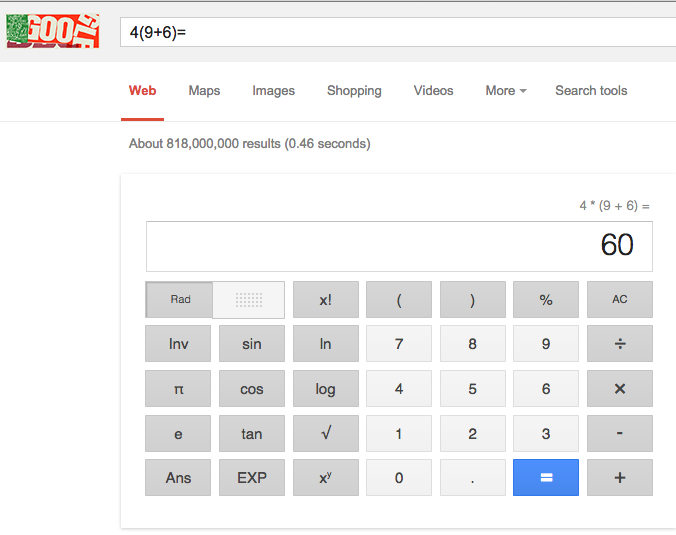
...and your answer will appear!


Screen Shot 2014-11-20 at 3.10.06 PM.png


Set A Timer


Via Google Search


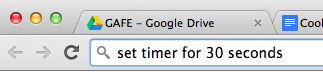
Type “Set timer for “x” minutes/seconds


Screen Shot 2014-11-21 at 11.13.21 AM.png


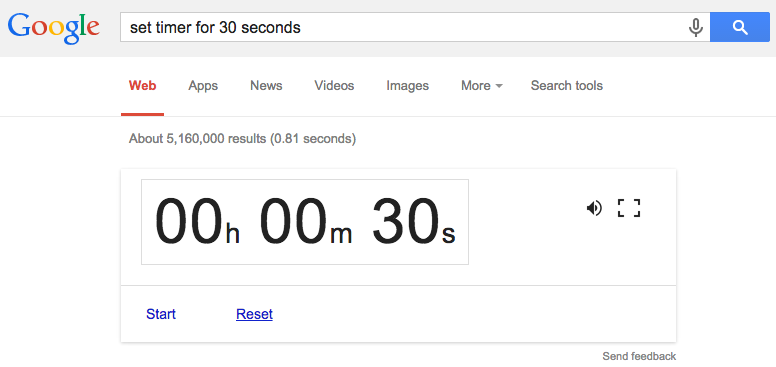
You will then get a timer pop up! It will start automatically, but you can stop, start, and reset as needed!


Screen Shot 2014-11-21 at 11.12.53 AM.png


Via Omnibox Timer
Install the extension from the Chrome Web Store


Screen Shot 2014-11-20 at 3.19.56 PM.png


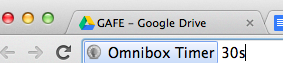
Type “tm” into the Omnibox followed by Tab or Space


Screen Shot 2014-11-21 at 11.32.38 AM.png


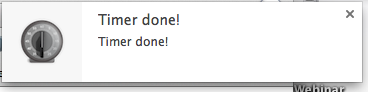
Type in the desired time, press the return key and you will be alerted when time is up!


Screen Shot 2014-11-21 at 11.33.21 AM.png


Extensions
Extensions are small “programs” that are installed into Chrome that increases the functionality and productivity of the browser. These have made me more productive by bringing more power to my creative environment.


While there are several that can be installed from the Chrome Web Store, here are the ones I use on a daily basis:


This extension will alert me if I have any new mail and, with one simple click, will open a new tab with my inbox displayed.


Save to Google Drive will allow me to save websites, pictures, or other web content right to my Google Drive and bypass my computer all together. Even cooler is that I can right-click on the content and “Save to Google Drive” will be an option!


No one likes an email, document, or anything that has a link that is a gazillion characters long. When I click this extension, the active URL is shortened to a nice goo.gl version and I can copy it to my clipboard. I can then paste it into an email, document, or simply display it. It also creates a QR code that I can take a screenshot of and insert into websites, presentations, and more.


Tab Scissors gives you two active windows on one screen. This is awesome because I can be reading a website or watching a YouTube video on one side and typing notes on a Google Doc on the other.


All of this coolness is not just for teachers; these are great for students as well! My high school just went 1:1 with Chromebooks last year and we have been showing students these same features. Get them using Chrome beyond searching and addresses and they will be more productive in their classes and quality digital citizens.


Have a happy day!

Tuesday, November 25, 2014

Increase Student Engagement With Google Apps

Hi all!

The following post is one I wrote for Synergyse, a company that specializes in Google Apps training, and their blog. Check them out!

Increase Student Engagement With Google Apps


Technology integration can become stalled when teachers and coaches focus solely on the subject area. Further, by necessity, many professional learning sessions are given to the entire, multi-discipline staff, and either the content becomes too thin or subjects get left out. It can become very easy for some teachers to say Google Apps is not a natural fit with what they teach.

But there are topics that are applicable in every classroom and I am going to focus on one of those: Student Engagement.

I subscribe to the idea that engagement is defined as “students speaking, writing, creating...DOING!” In other words, being polite and compliant does not mean the student is engaged. When students are actively involved in the learning, and it is visible, then it can be said that they are engaged. According to John Hattie, in his book Visible Learning, engagement has been identified to have an effect size of .48 on student achievement. Anything over a .4 is considered “significant.”

So how can Google Apps be used to increase student engagement? As it turns out, quite simply and powerfully! I am an instructional coach in a Google Apps district and I am going to share with you a few practices I have seen in our classrooms.

Google Drawings


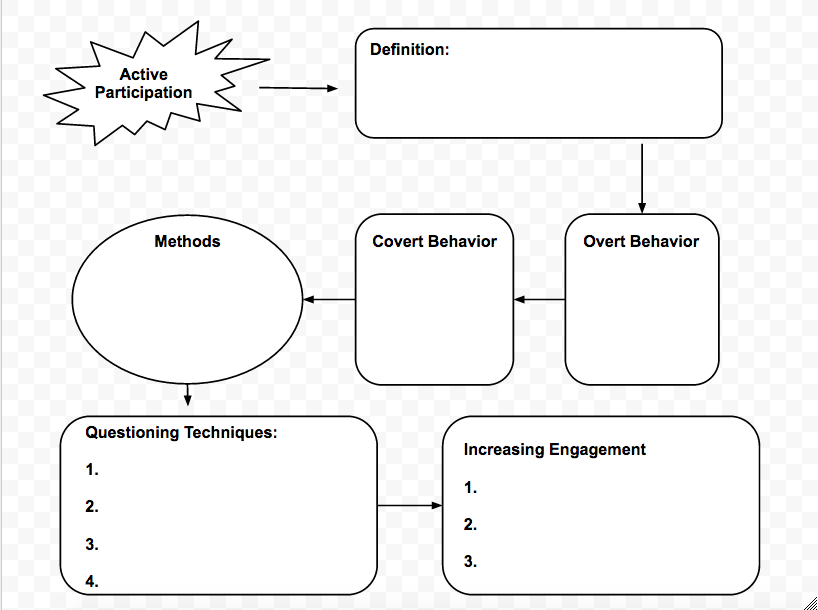
I have found the creation of Graphic Organizers to be one of the best use of Google Drawings. I, and many of my teachers, still utilize lecture for some instruction and like to have a slide deck as an accompaniment. In order to get students taking notes (writing) and understanding how the pieces fit together, graphic organizers are tremendous tools! I will go through my slide deck and create a flow-chart, using Google Drawings, with headings that match the presentation.

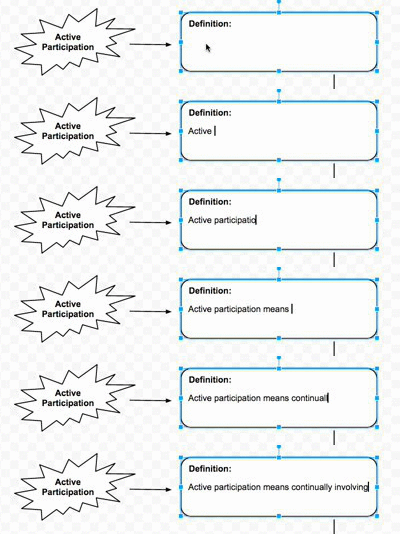
Below, you can see a simple graphic organizer that I made for an instructional theory class I teach.


Now, it is very easy to just print it off and let students put pen to paper, and that is just fine! However, if you have the technology, you can utilize less paper and have students complete it using a device. Here’s how:


  1. Give the students access to the document by either linking it to your website, the Google Template Gallery, or via Google Classroom. It is not necessary to share the document with the students.

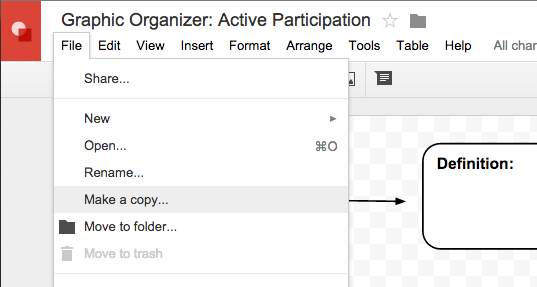
  1. The student will open the view-only document and make a copy of their own by selecting “Make a Copy” from the “File” menu.

  1. Now, in the student’s copy, they will be able to double-click in the boxes and type directly into the document. There is no need to add text-boxes! Just click and type!


Google Slides


The best part of Google Apps is the simplicity in sharing documents. With Google Slides, teachers can make available a copy of their slide deck so that students can follow along with the lecture. However, just clicking along is not enough to be engaged. Here are three methods I have seen in my teachers’ classes:

Cool:
  1. The teacher makes a view-only copy available to students via a website, email, Google Template Gallery, or Google Classroom.

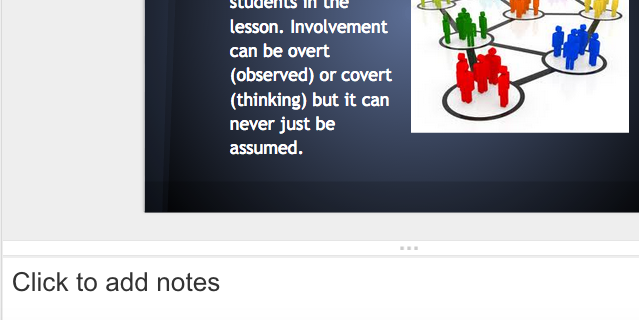
  1. Students then make an editable copy for themselves (from the “File” menu) and take notes in the “Presenter’s Notes” at the bottom of the window.


Even Cooler:
  1. The teacher makes a view-only copy available to students via a website, email, Google Template Gallery, or Google Classroom.

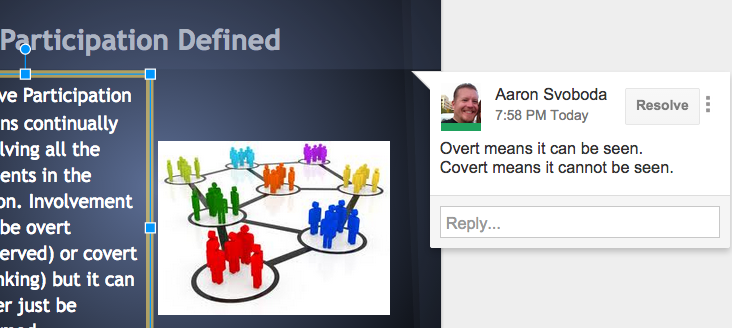
  1. Students then make an editable copy for themselves (from the “File” menu) and use the “Insert Comment” feature to add notes to the slide deck.


The Coolest:
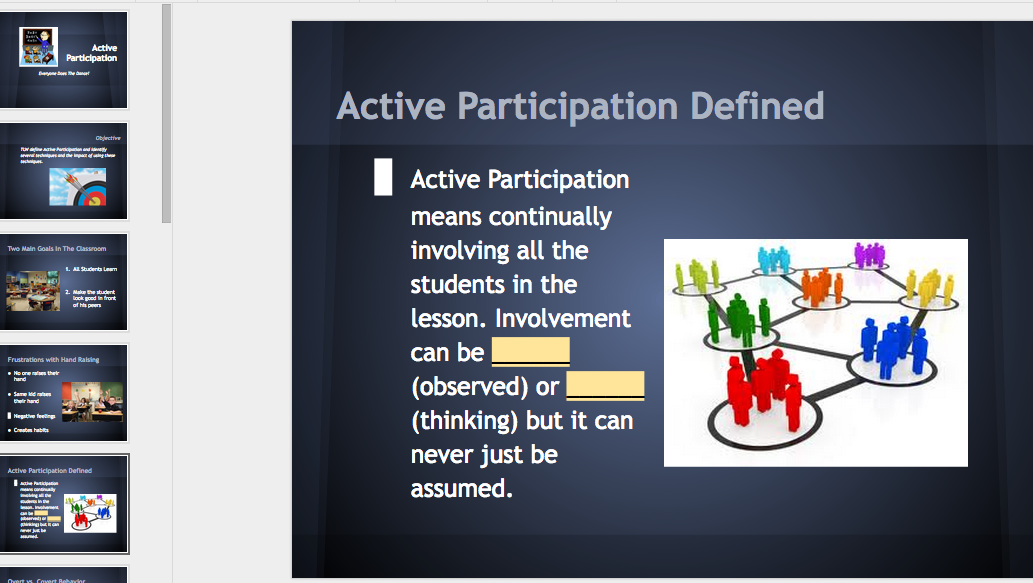
  1. The teacher makes a copy of their own Google Presentation and takes out key words on every slide. This new copy is the “Student Copy.” They then make available a view-only copy of the student version via a website, email, Google Template Gallery, or Google Classroom.

  1. Students then make an editable copy for themselves (from the “File” menu) and simply fill in the blanks as the teacher lectures.


These practices can be applied to other Google Apps as well and all get the students DOING something during a lecture. Get kids involved and active and they will learn more and enjoy learning more!

Wednesday, November 19, 2014

Time On Task: A New Perspective

Full disclosure...I might be late to the party here. But I had a "mental model" totally redesigned the other day.

I am a HUGE New Orleans Saints fan and I watch the weekly press conferences of the coaches and quarterback, Drew Brees, almost religiously. Last week, I was watching Drew's press conference and a reporter asked him if he feels more comfortable, the further he gets in his career, with putting passes in tight coverage or places that other quarterbacks might not even try. Here was his answer:

(video via www.neworleanssaints.com)

What struck me was how he addressed "Time On Task."

Historically, I think it is safe to say, teachers and administrators have defined this as the student "doing what he/she is supposed to be doing." We have techniques to quantify "time on task" that instructional coaches, administrators, and teachers use in the classroom. But Drew talked about "Time On Task" as a joint effort between him and his receivers. It wasn't just about his receivers, but it was about him, as well!

"We've had a lot of time on task..."

That made me think about Anita Archer and her ideas regarding instructional procedures and scaffolding. She addresses this here:

(video via Utah Personnel Development Center)

Notice that she references the "I Do/We Do/You Do" method of scaffolding. The last time I saw her in person, she made the point that the "We Do" is the most important part of that method. She said we should spend more time on the "We Do" than the others. This is much like Drew Brees talking about his relationship with his receivers.

Teaching and learning are partnerships. "Time on Task" is not just about behavior. It is about the time the teacher and student spend together working with the content. Too often, teachers move quickly from the "I Do" and go straight to the "You Do" and get frustrated by the lack of performance.

Maybe there is something we can learn from a future Hall of Fame quarterback.

Have a happy day!

Monday, October 27, 2014

Digital Citizenship Week 2014

Hi all!

Last week was Digital Citizenship Week and below is the video I made for our students' weekly 1:1 lesson.

In the video, I take exception to the phrase "Digital Citizenship" because it seems to infer that we should behave differently with technology than we do without. Further, schools are all asking "Where do we teach Digital Citizenship? Where should we? Who is responsible?"

To me, it should be "citizenship." This then begs the question "Where do you teach 'citizenship' in schools? The answer is "EVERYWHERE." Technology is now an inseparable part of our everyday life, so if you teach "citizenship" it is your responsibility to address "digital citizenship." If your students are using technology, it is your responsibility to be sure they are using it safely, respectfully, responsibly, and correctly.

As Abraham Lincoln said in Bill and Ted's Excellent Adventure, "Be excellent to each other!"


Have a happy day!

Thursday, October 2, 2014

Chromebook 101: Getting More Productivity Out Of Your Chromebook

Hi all! The following video hits some areas that would help to get more productivity out of your Chromebook. It was made for my school's students and teachers.

Enjoy!


Tuesday, August 26, 2014

ITIP of the Week: Increase Student Engagement with THINK-INK-LINK


Hello!

Engagement = Students SPEAKING, WRITING, CREATING...DOING!


Last week, I told  you about the Yes/No/Why and how it can be a powerful writing/engagement activity. This week, I am going to tell you about its close relative...

THINK/INK/LINK


Here are the rules for THINK/INK/LINK

1. Provide a prompt. Give the students something to write about.

2. Students SILENTLY think for a given amount of time. I usually use 30 seconds to a minute and students cannot write anything. This is time to just wrap their brains around their answer.

3. Students write their answer in NO MORE than TWO COMPLETE SENTENCES using ACADEMIC LANGUAGE. Again, I give them no more than a minute. Set a timer on both this and the second step!

4. Students then get up from their seats, find a partner, and take turns reading their answers VERBATIM!


Here's the rationale for this simple, yet powerful, activity:

• Students are writing! Not everything has to be an essay or long journal entry.

• Two sentences using academic language are far more powerful than a page of rambling slang, yes?

• Students are learning to think before they act. We could all learn from this.

• By having them read their answers verbatim, students are then SPEAKING in complete sentences. This doesn't happen too often, does it?

• By moving out of their seat and finding a partner, blood is moving from their caboose back up to their brain.

Try it out! I know you will love the results!

Have a happy day!